Sun Sep 30 19:03:15 PDT 2018

db4o is a Object oriented database. This tutorial was written to get you started with db4o as quickly as possible. Before you start, please make sure that you have downloaded the latest db4o distribution from the
db4objects website.
In this tutorial I have used
db4o-8.0.184.15484-all-java5.jar from
dropbox.com
Then kindly put the file in your project's
lib folder and configure project's
Build Path.
Enough, Let us start !!!
1. Create a class to configure db4o. I named it as Db4oHelper.
Code:
Db4oHelper.java
import java.io.IOException; import android.content.Context; import android.util.Log; import com.db4o.Db4oEmbedded; import com.db4o.ObjectContainer; import com.db4o.config.EmbeddedConfiguration; public class Db4oHelper { private static ObjectContainer oc = null; private Context context; /** * @param ctx */ public Db4oHelper(Context ctx) { context = ctx; } /** * Create, open and close the database */ public ObjectContainer db() { try { if (oc?

This post is a simple drawing example using Canvas, BitMap, Paint and Path classes from Android.
Code:
MainActivity.java
import java.util.ArrayList; import android.app.Activity; import android.content.Context; import android.graphics.Bitmap; import android.graphics.Canvas; import android.graphics.Color; import android.graphics.Paint; import android.graphics.Path; import android.os.Bundle; import android.view.MotionEvent; import android.view.View; import android.view.ViewGroup.LayoutParams; import android.widget.LinearLayout; public class DrwaingActivity extends Activity { View mView; private Paint mPaint; @Override protected void onCreate(Bundle savedInstanceState) { super.onCreate(savedInstanceState); setContentView(R.layout.activity_main); LinearLayout layout = (LinearLayout) findViewById(R.id.myDrawing); mView = new DrawingView(this); layout.addView(mView, new LayoutParams( LinearLayout.LayoutParams.MATCH_PARENT, LinearLayout.LayoutParams.MATCH_PARENT))?
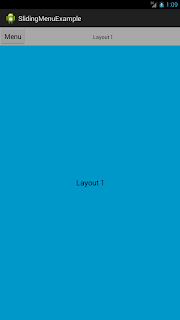
Consider using simple NavigationView instead of this old sliding menu , which based on Material design and much simpler and very flexible than this Navigation drawer.
This post will help you to create a simple sliding menu in Android.
Here sliding menu is a listview which is in INVISIBLE state. It will comes to VISIBLE state once you click the menu button. And it will go to INVISIBLE state again once you pick the item from listview. To change the state we are using animation, that is why it looks like sliding.
Complete code:
MainActivity.java
package com.android.slidingmenuexample; import android.os.Bundle; import android.support.v4.app.Fragment; import android.support.v4.app.FragmentActivity; import android.support.v4.app.FragmentManager; import android.support.v4.app.FragmentTransaction; import android.view.Menu; import android.view.View; import android.view.View.OnClickListener; import android.widget.AdapterView; import android.widget.ArrayAdapter; import android.widget.Button; ?
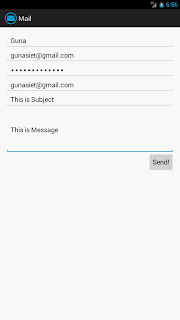
We know, We can send an e-mail using Intents, This will invoke either default mail app or built-in device mail apps to send an e-mail. This is unnecessary for user to work on e-mail application while he is trying to work an our application. So the question is
how to send an e-mail from android application without user interaction?
Answer is you can achieve this using
JavaMail API.
You have to use following three jars.
mail.jar
activation.jar
additionnal.jar Complete code:
MainActivity.java
package com.exmple.javamail; import android.app.Activity; import android.app.ProgressDialog; import android.os.AsyncTask; import android.os.Bundle; import android.view.View; import android.widget.Button; import android.widget.EditText; import android.widget.Toast; import java.io.UnsupportedEncodingException; import java.util.Properties; import javax.mail.Message; import javax.mail.MessagingException; import javax.mail.PasswordAuthentication; import javax.mail.Session; import javax.mail.Transport; i?
You can extract zip file by using ZipInputStream class in android.
MainActivity.java package com.android.zipextracter; import java.io.BufferedInputStream; import java.io.File; import java.io.FileInputStream; import java.io.FileOutputStream; import java.io.IOException; import java.io.InputStream; import java.util.zip.ZipEntry; import java.util.zip.ZipInputStream; import android.os.Bundle; import android.os.Environment; import android.widget.Toast; import android.app.Activity; public class MainActivity extends Activity { @Override protected void onCreate(Bundle savedInstanceState) { super.onCreate(savedInstanceState); setContentView(R.layout.activity_main); String zipFilePath = Environment.getExternalStorageDirectory() .getAbsolutePath()+"/"; unpackZip(zipFilePath, "MyRar.zip"); } private boolean unpackZip(String path, String zipname) { InputStream is; ZipInputStream zis; try { String filename; is = new FileInputStream(path + zipname)?

By this example you can access your DialogFragment throughout the application. You can send arguments to DialogFragment, and also you can retrieve values from DialogFragment.
Screenshot:
Code:
MyCustomDialog.java
package com.andoid.dialogfragment; import android.app.Dialog; import android.app.DialogFragment; import android.graphics.Color; import android.graphics.drawable.ColorDrawable; import android.os.Bundle; import android.view.View; import android.view.View.OnClickListener; import android.view.Window; import android.view.WindowManager; import android.widget.Button; import android.widget.EditText; public class MyCustomDialog extends DialogFragment { Button mButton; EditText mEditText; onSubmitListener mListener; String text = ""; interface onSubmitListener { void setOnSubmitListener(String arg); } @Override public Dialog onCreateDialog(Bundle savedInstanceState) { final Dialog dialog = new Dialog(getActivity()); dialog.getWindow().requestFeature(Window.FEA?

Now possible to hear the spoken of words by Android.
Screenshot:
Code:
TextToSpeechActivity.java
package com.android.texttospeach; import android.app.Activity; import android.os.Bundle; import android.speech.tts.TextToSpeech; import android.util.Log; import android.view.View; import android.widget.Button; import android.widget.EditText; import java.util.Locale; public class TextToSpeechActivity extends Activity implements TextToSpeech.OnInitListener { private static final String TAG = "MyTextToSpeechDemo"; private TextToSpeech mTts; private Button mPlayButton; EditText mEditText; @Override public void onCreate(Bundle savedInstanceState) { super.onCreate(savedInstanceState); setContentView(R.layout.text_to_speech); // Initialize text-to-speech. This is an asynchronous operation. mTts = new TextToSpeech(this, this); mPlayButton = (Button) findViewById(R.id.button1); mEditText = (EditText) findViewById(R.id.editText1); mPlayButton.setOnClickListener?

Video Output:
Source code link is added below.
Here we have a class called
MultiSelectionSpinner.
In this class we have following methods.
public void setItems(String[] items)
Used to set adapter items using array of strings to this spinner. public void setItems(List items)
Used to set adapter items using list of strings to this spinner. public void setSelection(String[] selection)
Used to set selected items on this adapter using array of strings to this spinner. public void setSelection(List selection)
Used to set selected items on this adapter using list of strings to this spinner. public void setSelection(int index)
Used to set single selected item using position to this spinner. public void setSelection(int[] selectedIndices)
Used to set selected items using array of integers to this spinner. public List getSelectedStrings()
Used to get the selected items as a string public List getSelectedIndices()
Used to get the selected indexes as a list of integers
I hope this post is usef?
SQLiteHelper.jar
This jar has the following functions.
1.
public SQLiteHelper(Context context, String dbname, CursorFactory factory, int version)
This constructor is used to initialize SQLiteOpenHelper class.
2.
public void createTable(String table_name, String[] fields, String[] types)
This method is used to create table with fields. Total number of fields and types must be equal.
3.
public ArrayList<HashMap<String, Object>> getFields(String table_name)
This method will return all fields with their types as ArrayList.
4.
public String insertData(String table_name, String[] fields, String[] data)
This method used to insert record in our table. This will return a String as Transaction successfully completed if the transaction completed. Otherwise it will return exception.
5.
public ArrayList<HashMap<String, Object>> getAllData(String table_name)
This method used to get all record from our table as arraylist.
6.
public ArrayList<H?
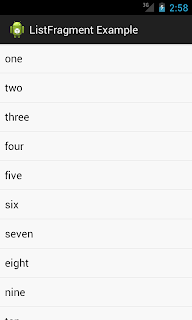
This post will help you to create simple ListFragment in android.
MainActivity.java
package com.example.listfragmentexample; import android.os.Bundle; import android.app.Activity; import android.app.FragmentManager; import android.app.ListFragment; import android.view.LayoutInflater; import android.view.View; import android.view.ViewGroup; import android.widget.ArrayAdapter; import android.widget.ListView; public class MainActivity extends Activity { @Override protected void onCreate(Bundle savedInstanceState) { super.onCreate(savedInstanceState); FragmentManager fm = getFragmentManager(); if (fm.findFragmentById(android.R.id.content) == null) { SimpleListFragment list = new SimpleListFragment(); fm.beginTransaction().add(android.R.id.content, list).commit(); } } public static class SimpleListFragment extends ListFragment { String[] numbers_text = new String[] { "one", "two", "three", "four", "five", &qu?
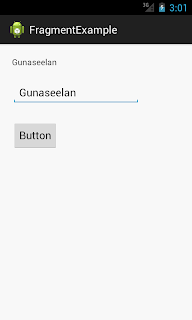
This post will help you to create simple Fragment in android.
MainActivity.java
package com.simple.sfragmentexample; import android.os.Bundle; import android.app.Activity; import android.app.Fragment; import android.app.FragmentTransaction; import android.view.LayoutInflater; import android.view.View; import android.view.ViewGroup; import android.view.View.OnClickListener; import android.widget.Button; import android.widget.EditText; import android.widget.TextView; public class MainActivity extends Activity { int i = 1; @Override protected void onCreate(Bundle savedInstanceState) { super.onCreate(savedInstanceState); setContentView(R.layout.fragment_simple); if (savedInstanceState == null) { Fragment newFragment = SimpleAddition.newInstance(i); FragmentTransaction ft = getFragmentManager().beginTransaction(); ft.add(R.id.FrameLayout1, newFragment).commit(); } else { i = savedInstanceState.getInt("level"); } } @Override public void onSaveInsta?
A Fragment represents a behavior of user interface in an Activity. A activity can have more than one fragments and also a fragment can be used in more than one activities.
Screen Shots of following tutorial.
Fragment 1
Fragment 2
See, Here I have used the Action Bar to navigate between tabs. Which were added in Android 3.0 (API level 11). So in lower version Action Bar doesn't work. You can take this post as Simple Action Bar tutorial in Android too :)
Following class works as a home for those two Fragments.
FragmentTabs.java
package com.example.fragmentexample; import android.app.ActionBar; import android.app.ActionBar.Tab; import android.app.Activity; import android.app.Fragment; import android.app.FragmentTransaction; import android.os.Bundle; public class FragmentTabs extends Activity { @Override protected void onCreate(Bundle savedInstanceState) { super.onCreate(savedInstanceState); final ActionBar bar = getActionBar(); bar.setNavigationMode(ActionBar.NAVIGATION_MOD?
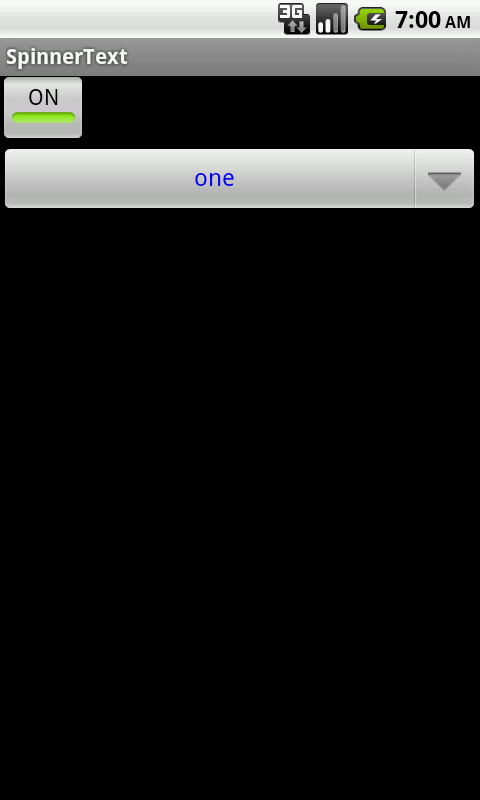
We can change the color of spinner text by click the button. Following four steps will explain it clearly.
1. Create a xml named spinnertext.xml in res/layout folder. Here we customize the text of spinner.
spinnertext.xml <TextView xmlns:android="http://schemas.android.com/apk/res/android" android:id="@+id/spinnerText" style="?android:attr/spinnerItemStyle" android:layout_width="fill_parent" android:layout_height="wrap_content" android:gravity="center" android:paddingBottom="2dp" android:paddingLeft="6dp" android:textColor="#662293" />
2. Create a xml named spinner_selector.xml in res/layout folder. Here we customize the spinner drop down menu.
spinner_selector.xml <TextView xmlns:android="http://schemas.android.com/apk/res/android" style="?android:attr/spinnerItemStyle" android:layout_width="fill_parent" ?
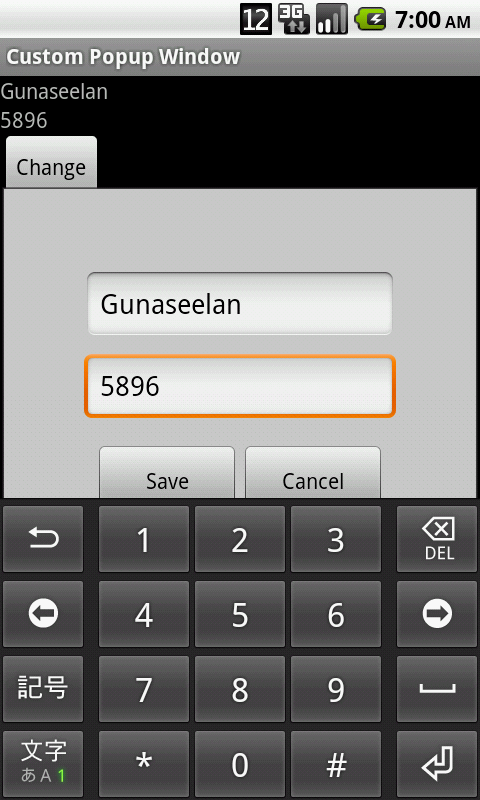
We can return values from custom popup window to activity using listener. Example code:
popup.xml
<LinearLayout xmlns:android="http://schemas.android.com/apk/res/android" android:layout_width="match_parent" android:layout_height="match_parent" android:background="#cdcdcd" android:gravity="center" android:orientation="vertical" android:padding="50dp" > <View android:layout_width="match_parent" android:layout_height="1dp" /> <EditText android:id="@+id/bank_name" android:layout_width="fill_parent" android:layout_height="wrap_content" android:layout_margin="3dp" android:hint="Name" android:inputType="textCapWords" /> <EditText android:id="@+id/bankacc_no" android:layout_wid?
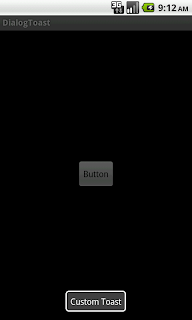
What is toast message?
In Adnroid,
Toast is a notification message that pop up and display a cirtain amount of time.
What is drawback toast message?
Toast message should displayed cirtain amount of time. We can not interrupt it within the time. For example if we set a toast message to display five seconds, we can not hide it within two or three seconds. Tha is main drawback of
Toast message.
How to avercome this drawback?
We can use
Dialog as toast message in android. There is two main advantages by using
Dialog as
Toast message.
1. We can hide the
Toast message any time by touching the screen.
2. While dispaly
Toast message the background will goes to dim. So user can read the toast message without interruption of other views.
DialogToast.java
import android.app.Dialog; import android.content.Context; import android.os.Handler; import android.view.Gravity; import android.view.LayoutInflater; import android.view.View; import android.view.Window; impor?

Simple drawing example in android.
In Android You can draw using
Canvas. First You have to get the touched points to draw. By using
onTouchEvent method You can get the touched points from android device. Our
onTouchEvent method will be
public boolean onTouchEvent(MotionEvent event) { PathWithPaint pp = new PathWithPaint(); if (event.getAction() == MotionEvent.ACTION_DOWN) { path.moveTo(event.getX(), event.getY()); path.lineTo(event.getX(), event.getY()); } else if (event.getAction() == MotionEvent.ACTION_MOVE) { path.lineTo(event.getX(), event.getY()); } else if (event.getAction() == MotionEvent.ACTION_UP) { path.lineTo(event.getX(), event.getY()); mCanvas.drawPath(path, mPaint); pp.setPath(path); pp.setmPaint(mPaint); _graphics1.add(pp); } invalidate(); return true; }
Now You are going to draw on the touched point. You have to override the
onDraw method to draw on the path. The
onDraw method will be like as following
@Override?


Comments
Post a Comment