Posts

Showing posts from November, 2018

Fri Nov 30 23:02:41 PST 2018

Image
Good morning to all, Those who all tried RecyclerView adapter with CheckBox, you all may find the issue on dynamic data change in RecyclerView. This will help you to resolve the issue in very simple way. Video output of this project So how to achieve this task effectively? Simple, I hope you all tried with list objects only. Surely this object will have the boolean variable to know whether this object is selected or not. So now while we are select one object with the help of recyclerview and scroll down and up recyclerview adapter, the checked checkbox's position may change, this reflects on our object also, So how to avaid this issue. simple, In our recyclerview adapter's onBindViewHolder method, first set the checkedOnChangeListener of checkbox to null, and then set whether this object is selected or not to checkbox, and then add the checkedOnChangeListener to the checkbox. That's all. Issue solved. onBindViewHolder will be look like @

Fri Nov 30 21:02:40 PST 2018

Image
Hi guys, you can use NavigationView on both side if you want side menu in both left and right side in Android as following. Your drawer layout will be &lt?xml version="1.0" encoding="utf-8"?&gt &ltandroid.support.v4.widget.DrawerLayout xmlns:android="http://schemas.android.com/apk/res/android" xmlns:app="http://schemas.android.com/apk/res-auto" xmlns:tools="http://schemas.android.com/tools" android:id="@+id/drawer_layout" android:layout_width="match_parent" android:layout_height="match_parent" android:fitsSystemWindows="true" tools:openDrawer="start"&gt &ltinclude layout="@layout/app_bar_main" android:layout_width="match_parent" android:layout_height="match_parent" /&gt &ltandroid.support.design.widget.NavigationView android:id="@+id/nav_view" ?

Fri Nov 30 19:02:42 PST 2018

Image
Hi guys, You can use NavigationView from android material design for slide menu in android. DrawerLayout xml &ltandroid.support.v4.widget.DrawerLayout xmlns:android="http://schemas.android.com/apk/res/android" xmlns:app="http://schemas.android.com/apk/res-auto" xmlns:tools="http://schemas.android.com/tools" android:id="@+id/drawer_layout" android:layout_width="match_parent" android:layout_height="match_parent" android:fitsSystemWindows="true" tools:openDrawer="start"> &ltinclude layout="@layout/app_bar_main" android:layout_width="match_parent" android:layout_height="match_parent" /&gt &ltandroid.support.design.widget.NavigationView android:id="@+id/navigation_view" android:layout_width="wrap_content" android:layout_height="match_parent" ?

Fri Nov 30 18:02:49 PST 2018

Image
We can change the RecyclerView from type of ListView to GridView in single line of code. Video output of sample project code is: private void setLayoutManager() { if (mColumnCount <= 1) { mColumnCount = 1; recyclerView.setLayoutManager(new LinearLayoutManager(context)); } else { recyclerView.setLayoutManager(new GridLayoutManager(context, mColumnCount)); } } Video output of sample project: I hope this post is useful to you. kindly share your feedback as comment here. Simple RecyclerView example in Android Simple RecyclerView example with filter option in Android Simple recyclerview example with checkbox in Android Source code on GitHub Thank You Good morning to all, Those who all tried RecyclerView adapter with CheckBox, you all may find the issue on dynamic data change in RecyclerView. This will help you to resolve the issue in very simple way. Video output of this project So

Fri Nov 30 16:01:55 PST 2018

Image
Beginning in Android 3.0, using the SearchView widget as an item in the action bar is the preferred way to provide search in your app. Like with all items in the action bar, you can define the SearchView to show at all times, only when there is room, or as a collapsible action, which displays the SearchView as an icon initially, then takes up the entire action bar as a search field when the user clicks the icon. Create your menu.xml as following. &ltmenu xmlns:android="http://schemas.android.com/apk/res/android" xmlns:app="http://schemas.android.com/apk/res-auto" xmlns:tools="http://schemas.android.com/tools" tools:context=".UploadActivity"&gt &ltitem android:id="@+id/search" android:icon="@android:drawable/ic_menu_search" app:actionViewClass="android.support.v7.widget.SearchView" android:title="@string/action_search" app:showAsAction=&?

Fri Nov 30 15:02:08 PST 2018

Image
Beginning in Android 3.0, using the SearchView widget as an item in the action bar is the preferred way to provide search in your app. Like with all items in the action bar, you can define the SearchView to show at all times, only when there is room, or as a collapsible action, which displays the SearchView as an icon initially, then takes up the entire action bar as a search field when the user clicks the icon. Create your menu.xml as following. &ltmenu xmlns:android="http://schemas.android.com/apk/res/android" xmlns:app="http://schemas.android.com/apk/res-auto" xmlns:tools="http://schemas.android.com/tools" tools:context=".UploadActivity"&gt &ltitem android:id="@+id/search" android:icon="@android:drawable/ic_menu_search" app:actionViewClass="android.support.v7.widget.SearchView" android:title="@string/action_search" app:showAsAction=&?

Fri Nov 30 11:02:44 PST 2018

Image
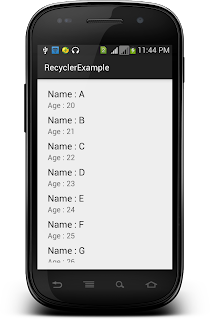
Hi guys, It's been a longtime, herewith I came up with a RecyclerView example, I hope you enjoy this blog too.  RecyclerView is just an advance for ListView. Hereafter you can use RecyclerView instead of ListView. RecyclerView can do all works performed by ListView. And also RecyclerView is more flexible with large data set. In this blog you can learn how to create a simple RecyclerView and also adapter for this RecyclerView. You can create RecyclerView by using appcompat-v7 support jar. Code: MainActivity.java import android.support.annotation.Nullable; import android.support.v7.app.ActionBarActivity; import android.support.v7.widget.LinearLayoutManager; import android.support.v7.widget.RecyclerView; import android.support.v4.app.Fragment; import android.os.Bundle; import android.view.LayoutInflater; import android.view.Menu; import android.view.MenuItem; import android.view.View; import android.view.ViewGroup; import java.util.ArrayList; import java.ut

Fri Nov 30 09:01:43 PST 2018

Image
Consider using simple NavigationView instead of this old Navigation drawer , which based on Material design and much simpler and very flexible than this Navigation drawer. This NavigationDrawer example is developed by using appcompat library project in eclipse kepler. Code: MainActivity.java import android.support.v7.app.ActionBarActivity; import android.support.v7.app.ActionBar; import android.support.v4.app.FragmentManager; import android.os.Bundle; import android.view.Menu; import android.view.MenuItem; import android.support.v4.widget.DrawerLayout; public class MainActivity extends ActionBarActivity implements NavigationDrawerFragment.NavigationDrawerCallbacks { /** * Fragment managing the behaviors, interactions and presentation of the * navigation drawer. */ private NavigationDrawerFragment mNavigationDrawerFragment; /** * Used to store the last screen title. For use in * {@link #restoreActionBar()}. */ private CharSequence mTitle; @Override protected

Fri Nov 30 01:02:42 PST 2018

Image
Using ConnectivityManager class we can detect Internet connection availability in Android. Code: ConnectionDetector.java import android.content.Context; import android.net.ConnectivityManager; import android.net.NetworkInfo; public class ConnectionDetector { private Context _context; public ConnectionDetector(Context context){ this._context = context; } /** * Checking for all possible internet providers * **/ public boolean isConnectingToInternet(){ ConnectivityManager connectivity = (ConnectivityManager) _context.getSystemService(Context.CONNECTIVITY_SERVICE); if (connectivity != null) { NetworkInfo[] info = connectivity.getAllNetworkInfo(); if (info != null) for (int i = 0; i < info.length; i++) if (info[i].getState() == NetworkInfo.State.CONNECTED) { return true; } ?

Thu Nov 29 23:02:43 PST 2018

Image
Hi guys, It's been a longtime, herewith I came up with a RecyclerView example, I hope you enjoy this blog too.  RecyclerView is just an advance for ListView. Hereafter you can use RecyclerView instead of ListView. RecyclerView can do all works performed by ListView. And also RecyclerView is more flexible with large data set. In this blog you can learn how to create a simple RecyclerView and also adapter for this RecyclerView. You can create RecyclerView by using appcompat-v7 support jar. Code: MainActivity.java import android.support.annotation.Nullable; import android.support.v7.app.ActionBarActivity; import android.support.v7.widget.LinearLayoutManager; import android.support.v7.widget.RecyclerView; import android.support.v4.app.Fragment; import android.os.Bundle; import android.view.LayoutInflater; import android.view.Menu; import android.view.MenuItem; import android.view.View; import android.view.ViewGroup; import java.util.ArrayList; import java.ut

Thu Nov 29 22:02:41 PST 2018

Image
db4o is a Object oriented database. This tutorial was written to get you started with db4o as quickly as possible. Before you start, please make sure that you have downloaded the latest db4o distribution from the db4objects website . In this tutorial I have used db4o-8.0.184.15484-all-java5.jar from dropbox.com Then kindly put the file in your project's lib folder and configure project's Build Path . Enough, Let us start !!! 1. Create a class to configure db4o. I named it as Db4oHelper. Code: Db4oHelper.java import java.io.IOException; import android.content.Context; import android.util.Log; import com.db4o.Db4oEmbedded; import com.db4o.ObjectContainer; import com.db4o.config.EmbeddedConfiguration; public class Db4oHelper { private static ObjectContainer oc = null; private Context context; /** * @param ctx */ public Db4oHelper(Context ctx) { context = ctx; } /** * Create, open and close the database */ public ObjectContainer d

Thu Nov 29 21:02:41 PST 2018

Image
This post is a simple drawing example using Canvas, BitMap, Paint and Path classes from Android. Code: MainActivity.java import java.util.ArrayList; import android.app.Activity; import android.content.Context; import android.graphics.Bitmap; import android.graphics.Canvas; import android.graphics.Color; import android.graphics.Paint; import android.graphics.Path; import android.os.Bundle; import android.view.MotionEvent; import android.view.View; import android.view.ViewGroup.LayoutParams; import android.widget.LinearLayout; public class DrwaingActivity extends Activity { View mView; private Paint mPaint; @Override protected void onCreate(Bundle savedInstanceState) { super.onCreate(savedInstanceState); setContentView(R.layout.activity_main); LinearLayout layout = (LinearLayout) findViewById(R.id.myDrawing); mView = new DrawingView(this); layout.addView(mView, new LayoutParams( LinearLayout.LayoutParams.MATCH_PARENT, LinearLayout.LayoutParams.MATCH_PARENT))?

Thu Nov 29 20:02:44 PST 2018

Image
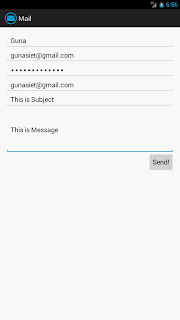
We know, We can send an e-mail using Intents, This will invoke either default mail app or built-in device mail apps to send an e-mail. This is unnecessary for user to work on e-mail application while he is trying to work an our application. So the question is how to send an e-mail from android application without user interaction? Answer is you can achieve this using JavaMail API . You have to use following three jars. mail.jar activation.jar additionnal.jar Complete code: MainActivity.java package com.exmple.javamail; import android.app.Activity; import android.app.ProgressDialog; import android.os.AsyncTask; import android.os.Bundle; import android.view.View; import android.widget.Button; import android.widget.EditText; import android.widget.Toast; import java.io.UnsupportedEncodingException; import java.util.Properties; import javax.mail.Message; import javax.mail.MessagingException; import javax.mail.PasswordAuthentication; import javax.mail.Ses

Thu Nov 29 19:02:19 PST 2018

Image
You can extract zip file by using ZipInputStream class in android. MainActivity.java package com.android.zipextracter; import java.io.BufferedInputStream; import java.io.File; import java.io.FileInputStream; import java.io.FileOutputStream; import java.io.IOException; import java.io.InputStream; import java.util.zip.ZipEntry; import java.util.zip.ZipInputStream; import android.os.Bundle; import android.os.Environment; import android.widget.Toast; import android.app.Activity; public class MainActivity extends Activity { @Override protected void onCreate(Bundle savedInstanceState) { super.onCreate(savedInstanceState); setContentView(R.layout.activity_main); String zipFilePath = Environment.getExternalStorageDirectory() .getAbsolutePath()+"/"; unpackZip(zipFilePath, "MyRar.zip"); } private boolean unpackZip(String path, String zipname) { InputStream is; ZipInputStream zis; try { String filename; is = new FileInputStream(path + zipname)? By this

Thu Nov 29 18:02:07 PST 2018

SQLiteHelper.jar This jar has the following functions. 1. public SQLiteHelper(Context context, String dbname, CursorFactory factory, int version) This constructor is used to initialize SQLiteOpenHelper class. 2. public void createTable(String table_name, String[] fields, String[] types) This method is used to create table with fields. Total number of fields and types must be equal. 3. public ArrayList&ltHashMap&ltString, Object&gt&gt getFields(String table_name) This method will return all fields with their types as ArrayList. 4. public String insertData(String table_name, String[] fields, String[] data) This method used to insert record in our table. This will return a String as Transaction successfully completed if the transaction completed. Otherwise it will return exception. 5. public ArrayList&ltHashMap&ltString, Object&gt&gt getAllData(String table_name) This method used to get all record

Thu Nov 29 15:02:40 PST 2018

Image
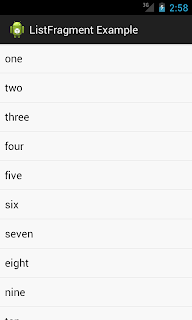
This post will help you to create simple ListFragment in android. MainActivity.java package com.example.listfragmentexample; import android.os.Bundle; import android.app.Activity; import android.app.FragmentManager; import android.app.ListFragment; import android.view.LayoutInflater; import android.view.View; import android.view.ViewGroup; import android.widget.ArrayAdapter; import android.widget.ListView; public class MainActivity extends Activity { @Override protected void onCreate(Bundle savedInstanceState) { super.onCreate(savedInstanceState); FragmentManager fm = getFragmentManager(); if (fm.findFragmentById(android.R.id.content) == null) { SimpleListFragment list = new SimpleListFragment(); fm.beginTransaction().add(android.R.id.content, list).commit(); } } public static class SimpleListFragment extends ListFragment { String[] numbers_text = new String[] { "one", "two", "three", "four", "five", &qu?

Thu Nov 29 14:02:54 PST 2018

Image
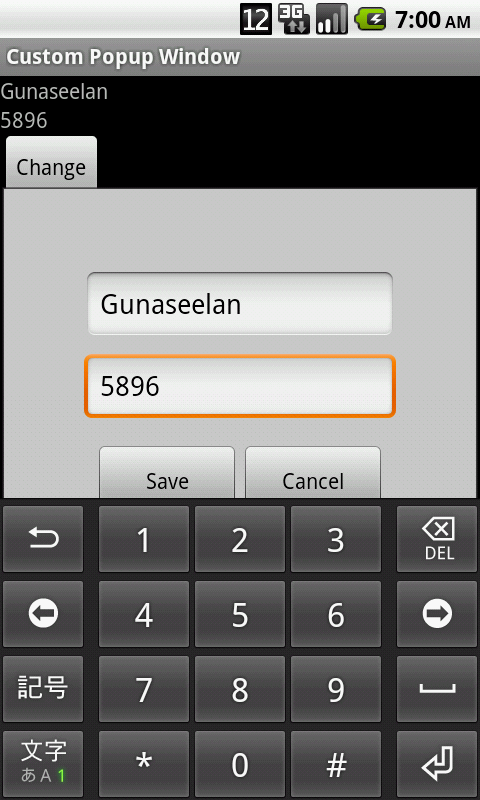
We can return values from custom popup window to activity using listener. Example code: popup.xml &ltLinearLayout xmlns:android="http://schemas.android.com/apk/res/android" android:layout_width="match_parent" android:layout_height="match_parent" android:background="#cdcdcd" android:gravity="center" android:orientation="vertical" android:padding="50dp" &gt &ltView android:layout_width="match_parent" android:layout_height="1dp" /&gt &ltEditText android:id="@+id/bank_name" android:layout_width="fill_parent" android:layout_height="wrap_content" android:layout_margin="3dp" android:hint="Name" android:inputType="textCapWords" /&gt &ltEditText android:id="@+id/bankacc_no" android:layout_wid? What is toast message?          In Adnroid, Toast is a notification message tha

Thu Nov 29 13:02:52 PST 2018

Image
Already we know that we can set which type of input the edittext should accept from user using android:inputType="numberDecimal" But there is no predefined function to set the limit for the edittext to How many digit it should accept after the decimal point from user . We can achieve this by using TextWatcher . Full code example. Following program creates a Decimal Filter. DecimalFilter.java import android.text.Editable; import android.text.InputFilter; import android.text.TextWatcher; import android.view.KeyEvent; import android.view.View; import android.view.View.OnKeyListener; import android.widget.EditText; public class DecimalFilter implements TextWatcher { int count= -1 ; EditText et; Activity activity; public DecimalFilter(EditText edittext, Activity activity) { et = edittext; this.activity = activity; } public void afterTextChanged(Editable s) { if (s.length() > 0) { String str = et.getText().toString(); et.setOnKeyListener(n

Thu Nov 29 12:02:51 PST 2018

Image
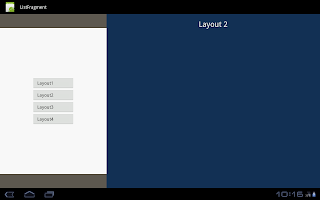
A Fragment represents a behavior of user interface in an Activity. A activity can have more than one fragments and also a fragment can be used in more than one activities. You can use Fragment instead of Activity , TabActivity, ListActivity etc., Why Fragments?             TabActivity was deprecated in API Level 13 Because it is a subclass of ActivityGroup And ActivityGroup was deprecated because of slow performance. You can use the Fragment and FragmentManager APIs instead. When compared to activity the Fragment is much faster.             This post is an example of ListFragment in android. A Fragment that displays a list of items by binding to a data source such as an array or Cursor, and exposes event handlers when the user selects an item.             ListFragment hosts a listview object that can be bound to different data sources, typically either an array or a Cursor holding query results. The following program creates a ListFragment. List

Thu Nov 29 11:02:46 PST 2018

Image
AChartEngine is now the most widely used jar in the world to draw various types of following charts.             1. Graphical chart             2. Line chart             3. Bar chart             4. Scatter chart             5. Time chart             6. Pie chart This article is about draw pie chart using achartengine. Sample screen shot of pie chart drawn using achartengine. This pie chart has the following options.         1. Movable         2. Zoomable         3. Clickable To draw this chart first you have to import achartengine  jar into your project folder. If you are using eclipse  then right click on your project --> Build Path --> Configure Build Path --> Libraries tab --> Add External JARs. This is the way to import external jars into our project. Coding: main.xml &ltLinearLayout xmlns:android="http://schemas.android.com/apk/res/android" android:layout_width="